02Using the app
Getting Started
This app is for scanning visitor badges at events.
Quick Flow Overview
Follow these checkpoints:
- Launch & Splash → wait for the purple Access Control splash screen to finish loading.
- Select Client (first launch, or after Change) → ADNEC, DMG, Xporience, or Terrapinn. This sends scans to that client’s dashboard.
- Login → enter username + password for that client and tap LOGIN, or tap SCAN TO LOGIN and scan the login QR you were given.
- App pinned prompt (after login, before space) → Android may show App is pinned. Tap Got it. Do not tap No thanks — that unpins the app.
- Select Space → search or tap the correct gate, confirm if prompted.
- Dashboard → verify Online status, check stats, tap Sync in the header if needed.
- Scan → tap the floating QR button, keep scanning (even offline).
- Menu actions → open the hamburger (☰) for Export Excel, Send Report, Pin/Unpin, Sound Lock, About, Logout. Most of these ask for the security password from login.
Switch client: logout → on Login tap the client name / pencil → pick another client. Sync (or wipe) unsynced scans for the client you are leaving first.
Visual Walkthrough
Use these screenshots to get familiar with each screen before you are onsite.
Splash Screen
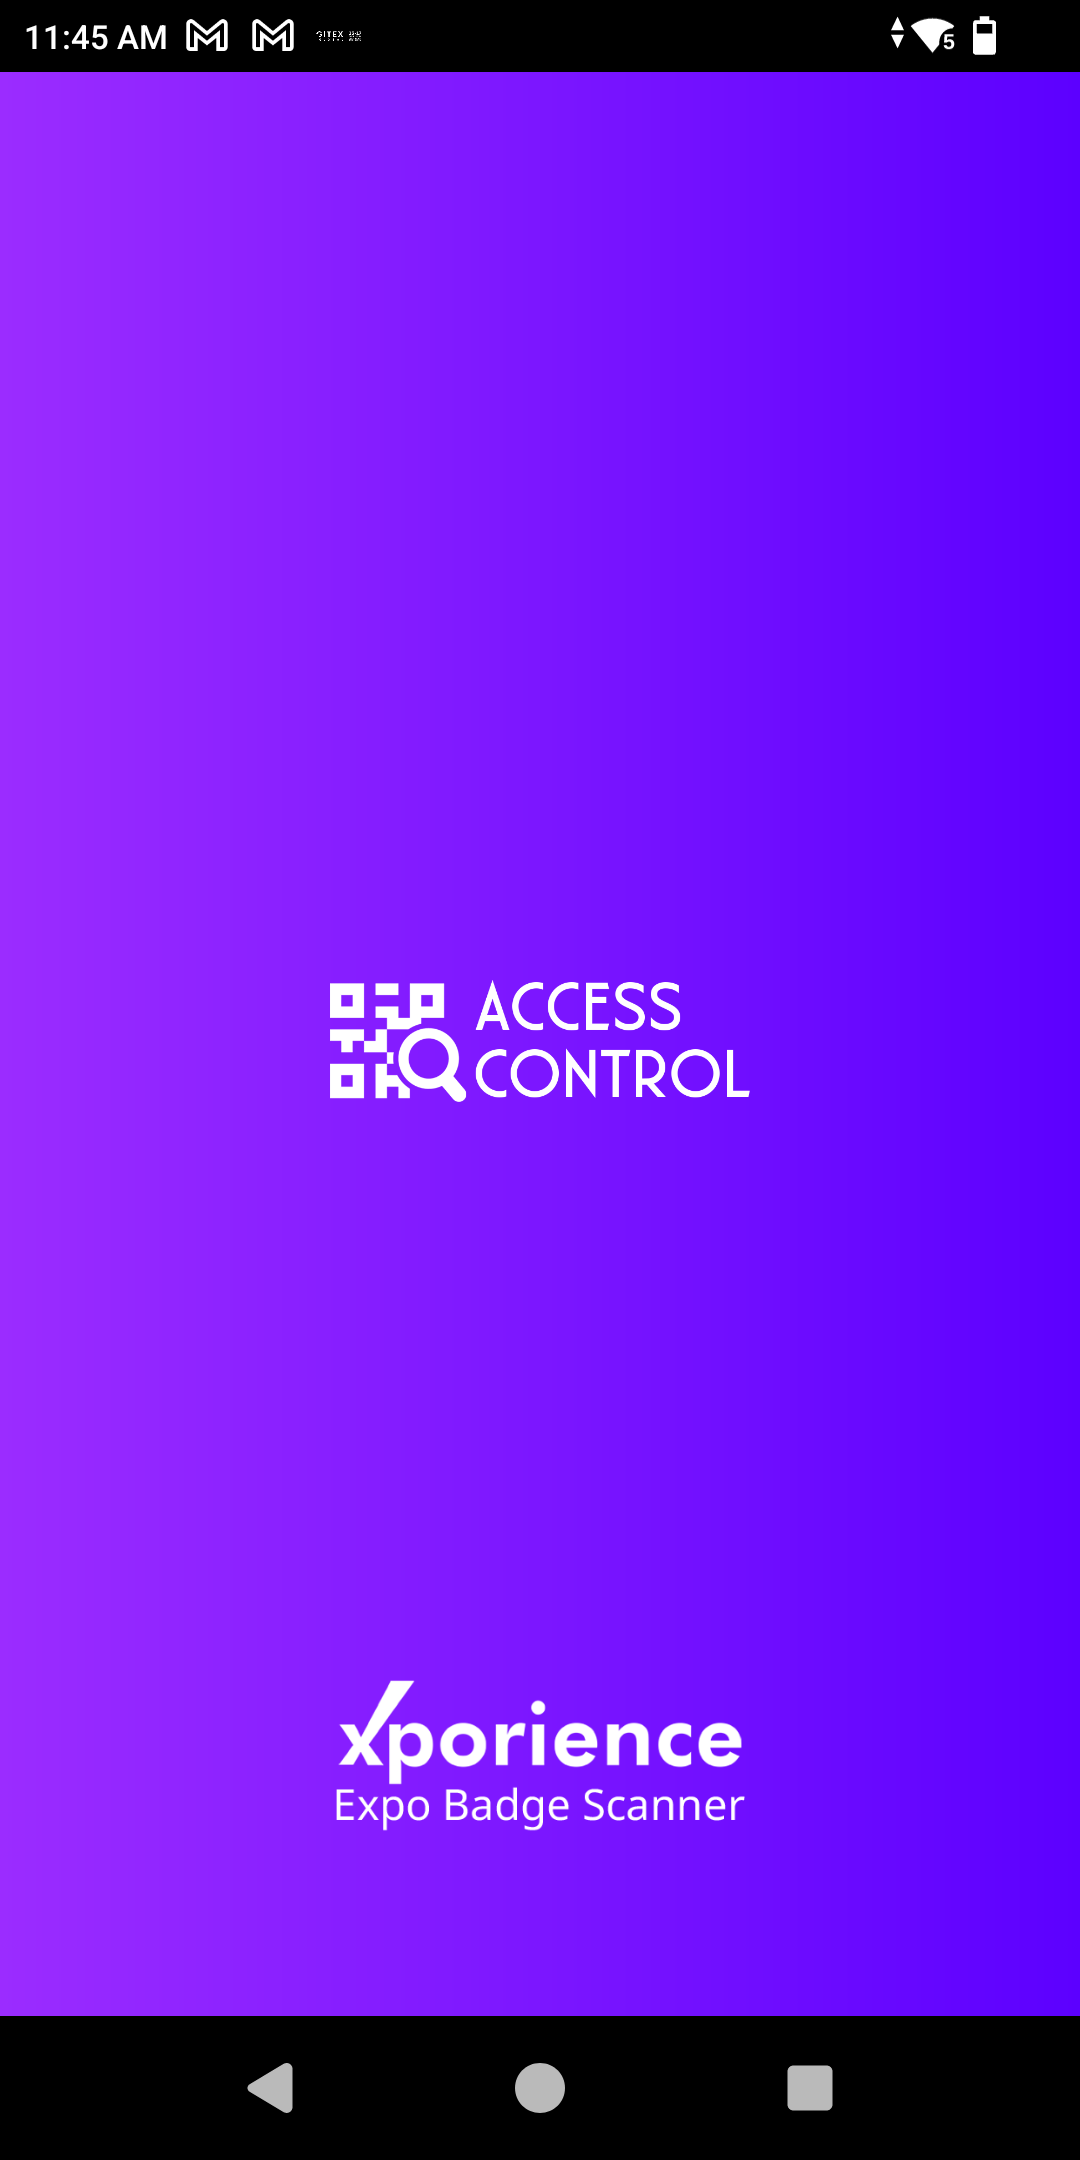
App boot screen – indicates the bundle is loading.
- Shows the branded purple gradient background and Access Control logo while the app initializes.
- Confirms that the Access control bundle is loading correctly before navigation is available.
Select Client
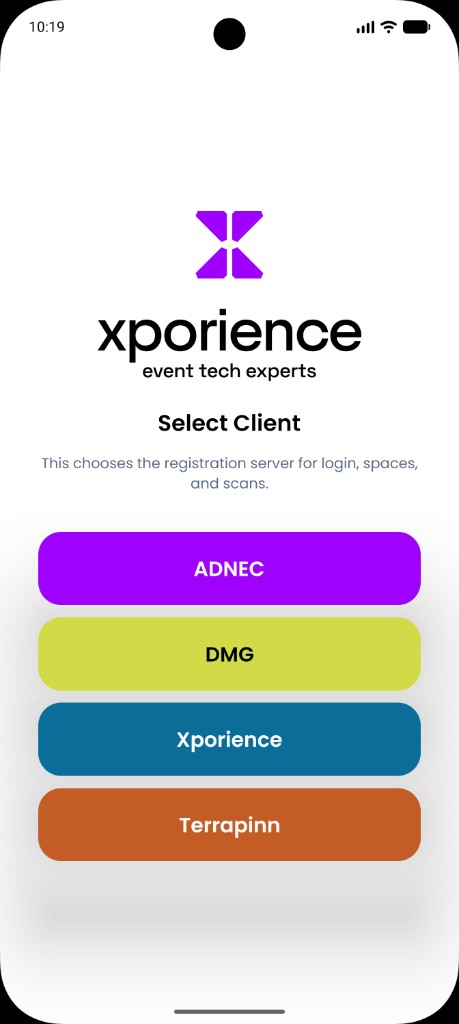
First launch (or Change): pick the registration client for this event.
- Choose ADNEC, DMG, Xporience, or Terrapinn.
- This sets which server handles login, spaces, and scans.
- The choice is remembered until you change it while logged out.
Login Screen
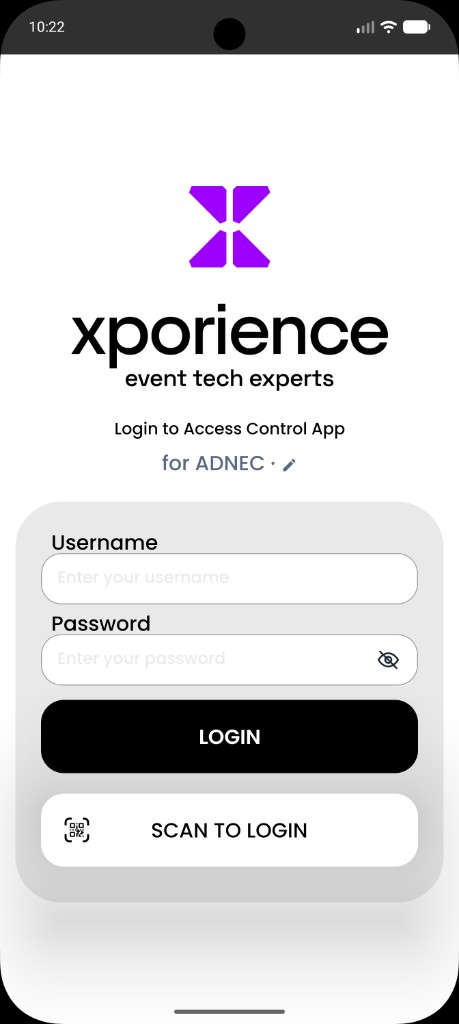
Log in for the selected client — type credentials or scan the login QR.
- Shows for {Client} with a pencil to change client while logged out.
- Option A: Enter Username and Password, then tap LOGIN.
- Option B: Tap SCAN TO LOGIN, then scan the login QR provided by your organizer (fills credentials and continues).
- Password field includes a visibility (eye) toggle.
App is pinned (after login)
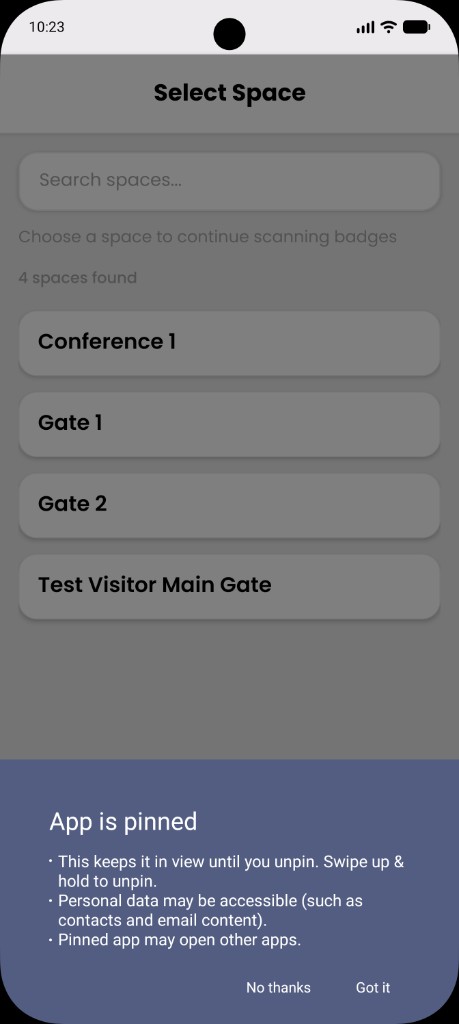
System pin prompt — always tap Got it so the app stays pinned on the floor.
Critical: Tap Got it.
Do not tap No thanks. That unpins the app and staff can leave Access Control with Home / Overview.
- Appears after a successful login when Lock Task / screen pin starts (especially without MDM allowlist).
- After Got it, continue to Select Space.
Space Selection Screen
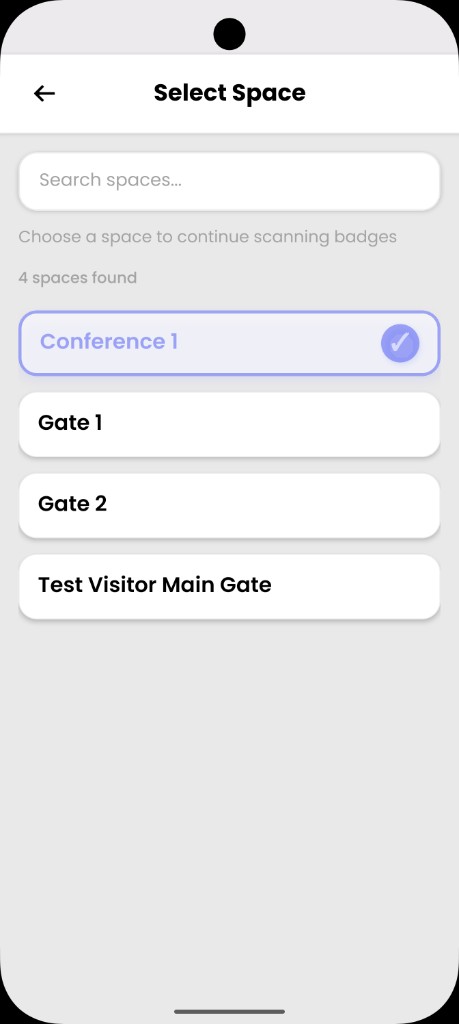
Search or tap the correct gate, then continue to the dashboard.
- Appears after login (and after dismissing the pin prompt if it was shown).
- Search bar filters long space lists; the selected space highlights with a check mark.
- Tap your gate/space to continue to Home.
Password Prompt Modal
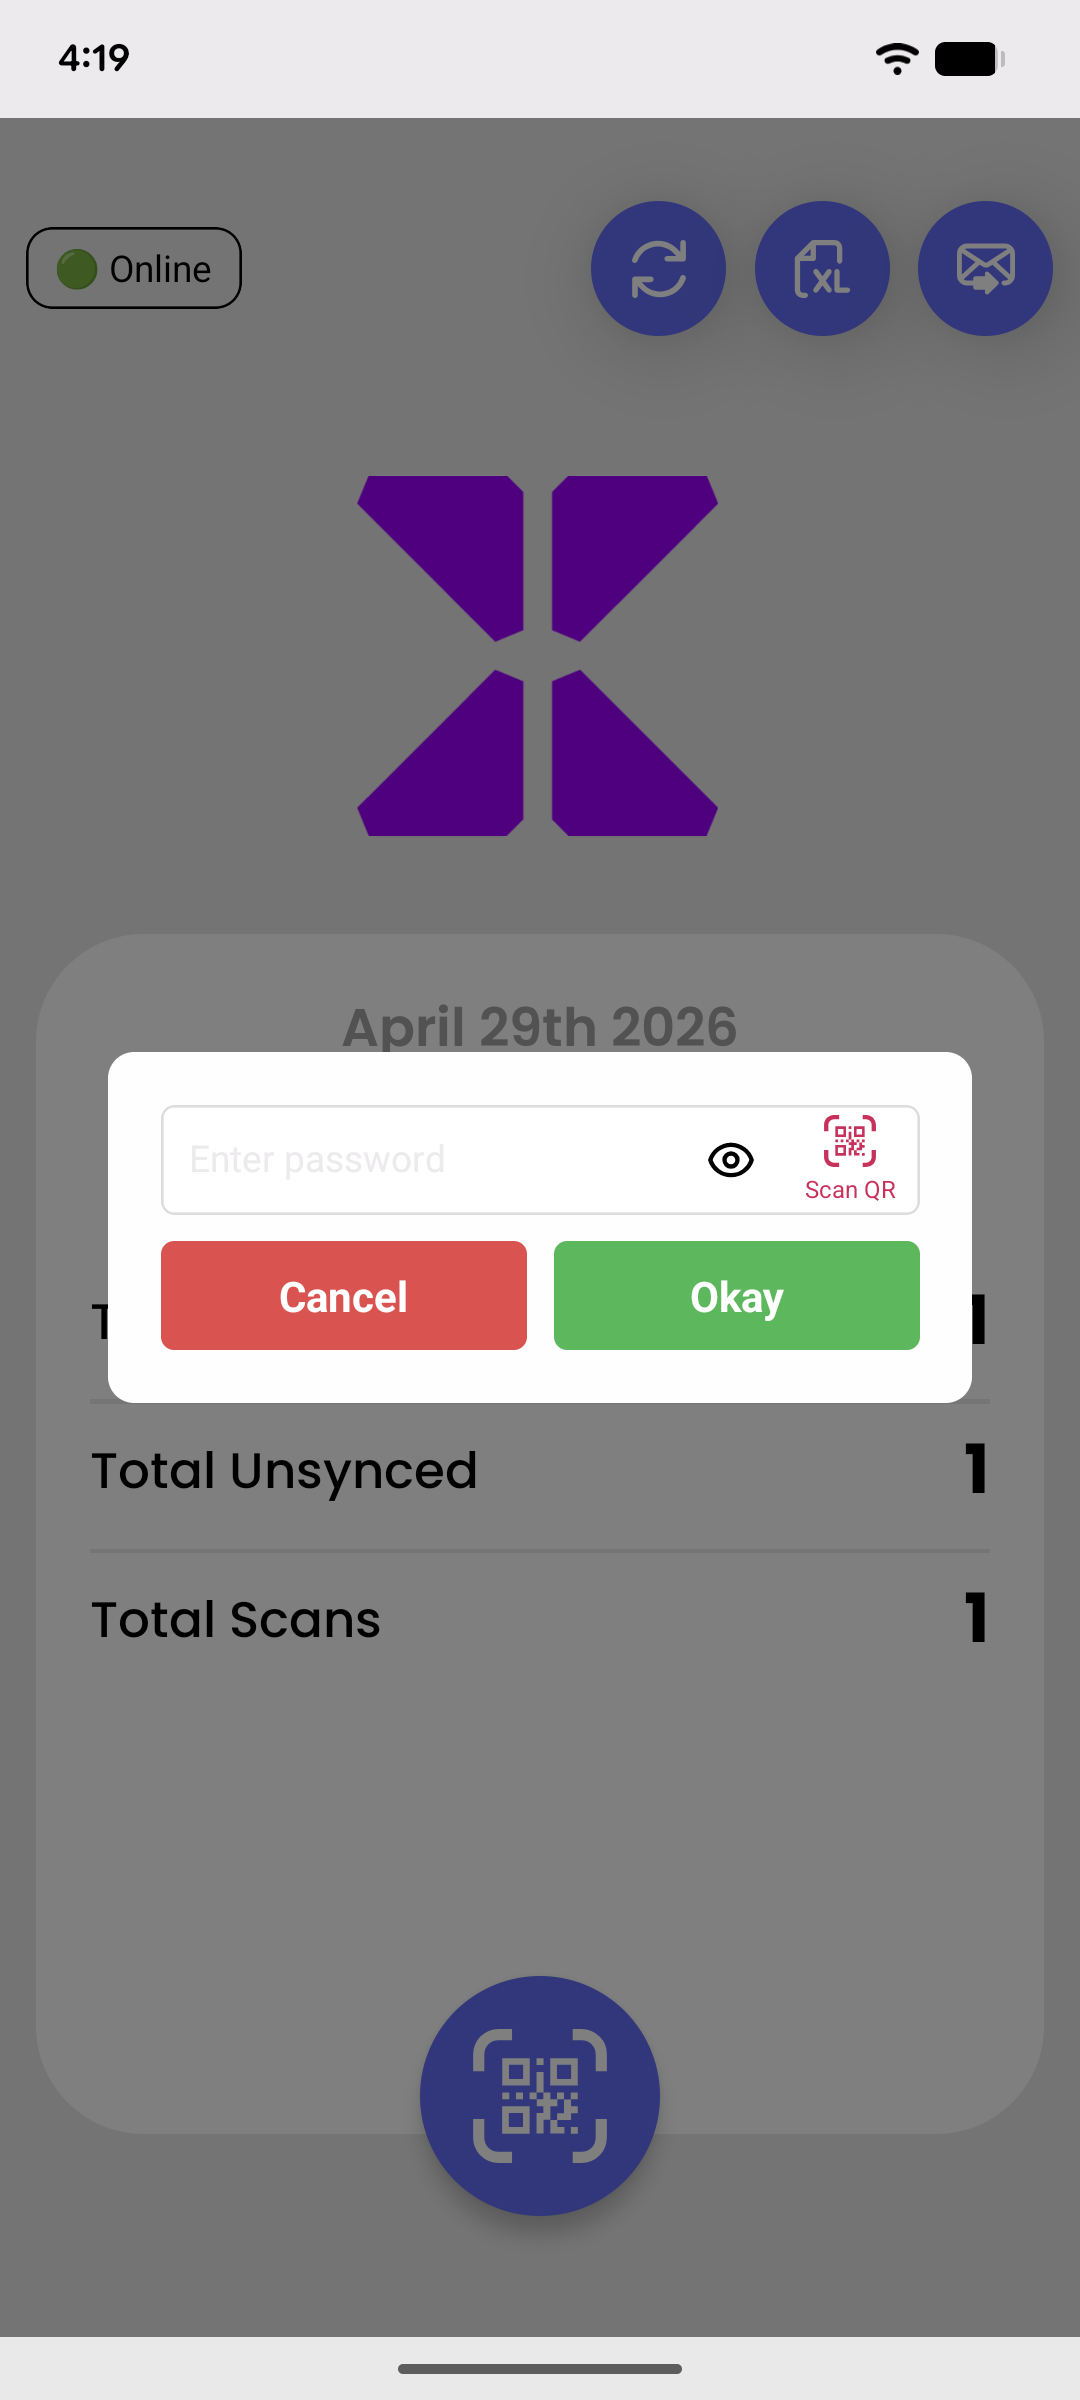
Shown for menu actions (export, report, pin, sound) and some space changes — use the security password from login.
- Enter the security password issued at login (
excel_security_password), or tap Scan QR if you have a password QR. - Used for: Export Excel, Send Report, Pin / Unpin App, Enable / Disable Sound Lock, and (when required) switching spaces.
- Cancel backs out; Okay confirms.
Home Dashboard
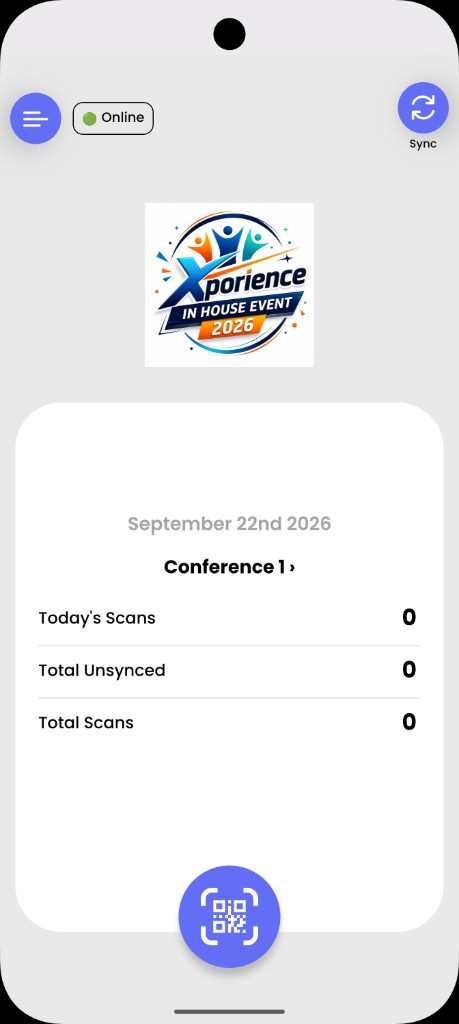
Online status, stats, Sync in the header, hamburger menu, and the big scan button.
- Hamburger (☰) top-left → opens the side menu (export, report, pin, sound, About, logout).
- Online / Offline badge next to the menu.
- Sync stays in the header (top-right) — tap to upload unsynced scans. It is not inside the side menu.
- Card shows date, selected space (tap to change), Today’s Scans / Total Unsynced / Total Scans.
- Floating scan button opens the camera scanner.
Side menu (hamburger)
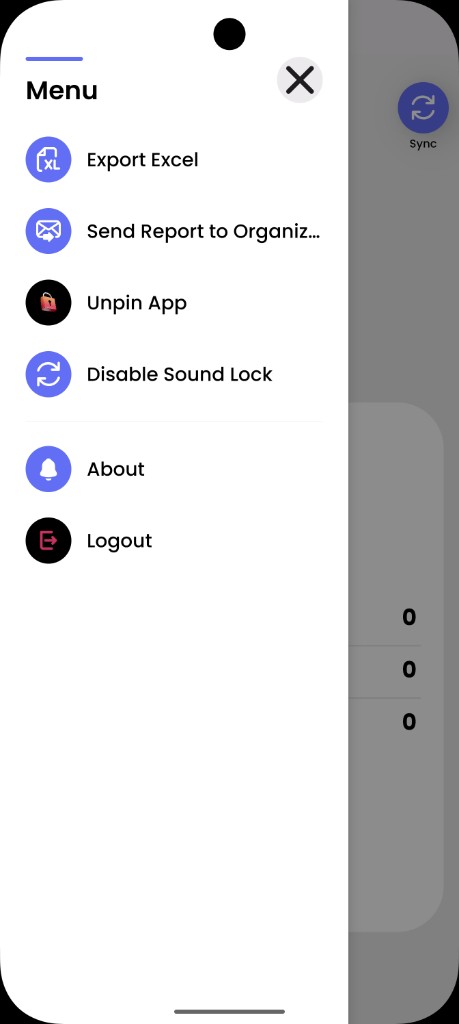
Export, Send Report, Pin/Unpin, and Sound Lock live here — Sync stays on the header.
Tap the X or the dimmed area to close the menu. Sync remains on the Home header only.
Select Client (before login)
One Access Control app serves all events. On first launch you Select Client (ADNEC, DMG, Xporience, or Terrapinn). That choice sets which registration server and dashboard receive your scans. The device remembers it until you change it.
Temporary migration: If an older client-specific app is still installed, uninstall it once, then install com.hindavi.accesscontrolapp from private Play. Details: Install app.
To switch later: Log out → on the login screen tap the client label / pencil → pick the new client. You must sync or wipe unsynced scans for the client you are leaving.
Login Process
Step-by-Step Login
-
Open the App
- Launch the Access Control Mobile App
- If asked, select the correct client for this event
- You'll see the login screen (shows which client is active)
-
Enter Credentials
Option A: Manual Entry
- Username: Enter your username (no spaces allowed)
- Password: Enter your password
- Tap the eye icon to show/hide password
Option B: QR Scan (Quick Login)
- Tap "SCAN TO LOGIN"
- Scan the login QR provided by your organizer (JSON or
username:password) - App fills credentials and continues with login
-
Tap LOGIN Button (or wait for auto-login after QR scan)
- Wait for authentication (spinner will show)
- If Android shows App is pinned, tap Got it (never No thanks)
- Then you'll be taken to Space Selection screen
Login Troubleshooting
Space Selection
A Space is a specific area or location at the event where you'll be scanning badges. You must select a space before you can start scanning.
Selecting Your Space
-
After Login
- If you see App is pinned, tap Got it first (do not tap No thanks)
- You'll see a list of available spaces
-
Search for Space (if many spaces)
- Use the search bar at the top
- Type space name to filter
-
Select Your Space
- Tap on the space you want to work in
- Wait for confirmation
-
Success!
- You'll be taken to the Home Screen
- Your selected space name appears on Homescreen.
Understanding Space Types
Home Screen Overview
Main Components
The Home Screen is your main dashboard. Here's what you'll see:
Top Section:
- Hamburger (☰) - Opens the side menu
- Online / Offline badge
- Sync (header, top-right) - Upload unsynced scans; stays on the header, not in the menu
- Event logo - Event branding
Side menu (hamburger):
- Export Excel - Export scans (asks for security password from login)
- Send Report to Organizer - Email report (asks for security password from login)
- Pin App / Unpin App - Screen pin control (asks for security password from login)
- Enable / Disable Sound Lock - Sound enforcement control (asks for security password from login)
- About - App / client / event info
- Logout - End session
Stats card:
- Current Date - Shows today's date
- Space Name - Your selected space (tap to change)
- 📊 Today's Scans - Badges scanned today
- 🔄 Total Unsynced - Badges waiting to sync
- 📈 Total Scans - All-time scan count
Bottom:
- Scan button - Opens camera scanner
Understanding the Sync Icon
💡 Tip: Tap the sync icon to manually trigger sync if needed.
Scanning Badges
Two Ways to Scan
The app supports two scanning methods:
- 🔴 Laser Scanner - Uses QR code scanner (recommended)
- 📷 Camera Scanner - Uses device camera
Method 1: Laser Scanner
- Scanner will automatically detect when badge is scanned
- Same feedback sounds and messages apply
Method 2: Camera Scanner
Opening the Scanner
- From Home Screen, tap "SCAN BADGE" button
- Camera will open automatically
- Grant camera permission if asked (first time only)
How to Scan
-
Wait for Scan
- Camera will automatically detect QR code
- You'll hear a success sound ✅ or error sound ❌
- Device will vibrate for feedback
-
Result Messages
- ✅ "Successfully Checked in" - Badge scanned successfully
- ❌ "Invalid Badge" - QR code format is wrong
- 🔄 "Successfully Checked in" (offline) - Saved locally, will sync later
-
Continue Scanning
- Camera stays open for continuous scanning
- No need to tap button again
- Scan multiple badges quickly
Understanding Scan Results
Understanding Sync Status
Syncing means uploading scanned badges from your device to the server.
Sync States
Important Notes
- Don't scan during sync - Wait for sync to complete
- Check internet - Sync requires internet connection
- Offline badges are safe - They'll sync when internet returns
Viewing Statistics
Statistics Cards on Home Screen
The Home Screen shows three important statistics:
1. Today's Scans
- Shows count of badges scanned today
- Resets at midnight
- Includes both synced and unsynced badges
2. Total Unsynced
- Shows count of badges waiting to sync
- Should be 0 when fully synced
3. Total Scans
- Shows all-time scan count
- Includes all badges ever scanned
- Never resets
Understanding the Numbers
Exporting Data
Exporting Badge Data
You can export scanned badge data to Excel/CSV, or send a report to the organizer, from the hamburger side menu (not from the header). Sync stays on the Home header.
How to Export Excel:
- On the Home Screen, tap the hamburger (☰) top-left
- Tap Export Excel
- Password popup appears — enter the security password from login (or Scan QR for the password QR)
- File is generated for sharing / Sheets
How to Send Report to Organizer:
- Open the hamburger (☰) menu
- Tap Send Report to Organizer
- Enter the same security password from login (or scan password QR)
- Complete sending in Gmail when prompted
Pin / Unpin and Sound Lock:
These are also in the side menu and use the same security password from login when confirming.
What Gets Exported:
- ✅ All scanned badges (synced + unsynced)
- ✅ Badge numbers, dates, times
- ✅ Space information
- ✅ Event details
Export File Format
- Format: CSV
- Naming: Includes date and space name
Switching Spaces
When to Switch Spaces
You might need to switch spaces if:
- You're moving to a different area
- You're covering multiple spaces
- You selected the wrong space initially
How to Switch
- From Home Screen, tap the space name at the bottom (or the arrow ›)
- Enter password manually or tap "Scan QR" icon to scan a QR code containing the password
- Select new space from the list
- Wait for sync - App will sync offline badges before switching
- Confirm selection - You'll return to Home Screen with new space
Important Notes
- Statistics reset for the new space
- Make sure sync completes before switching
- You can switch back to previous spaces anytime
Complete Setup Checklist
Device Settings (5 minutes)
- Screen timeout → Set to maximum (30 min or Never)
- Volume → Turn to maximum
- Do Not Disturb → Turn OFF
- Silent Mode → Turn OFF
- Test sound → Play a notification to verify
Internet Connection (2 minutes)
- Wi-Fi or Mobile Data → Connected and active
- YouTube test → Video plays smoothly
- Browser test → Google.com loads
- Signal strength → 2-3 bars minimum
App Permissions (1 minute)
- Camera permission → Granted (app will ask)
- Storage permission → Granted (Android only, when exporting)
Timezone Settings (1 minute)
- Device timezone → Set to the event country's timezone
- Account/event timezone → Confirmed with admin for the same country
- Clock check → Device time matches local venue time
App Testing (2 minutes)
- Login → Successfully logged in
- Space selection → Spaces loaded correctly
- Camera scanner → Opens without errors
- Test scan → Try scanning a QR code (if available)
- Sound feedback → Hear success/error sounds
- Vibration → Feel haptic feedback
Final Checks
- Battery → Charged or plugged in
- Storage space → At least 1 GB free
- Login credentials → Ready to use